|
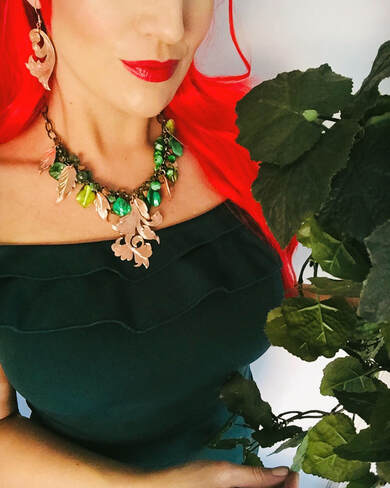
Incorporating pieces of hand engraved jewelry into my costume builds is one of my favorite elements in creating a character's look and this year was no exception. My idea was to create my own version of the character, Poison Ivy, with a bit of a retro vibe.  Using scrap copper, I freehand engraved leaf designs and cut them out with a jeweler's saw. I happened to find a used necklace at a consignment store which, once rearranged a bit, seemed to be a good fit with the copper pieces I crafted. To coordinate with them, I also made a pair of engraved copper earrings. When constructing a costume, I like to use a combination of handmade, used, upcycled and scrap pieces to keep the costs of a project down and stretch my creativity. It is the same way I made costumes while I was growing up and it gives me that childlike creative feeling all over again.
Initially, I was going to fabricate the leaves of my headpiece by hand but I came across this piece of vintage wall art and thought it would be the perfect way to upcycle the material. Forming a brass headband from scrap, I then soldered the leaves to it. Once everything was soldered in place, I used an accelerant to give the leaves a bit of patina. Due to the circumstances of Covid this year, many Halloween events have been cancelled. My daughter and I decided we'd dress up anyway, carve a pumpkin, make some treats and enjoy a Halloween movie together. Making our own fun is something we are pretty good at and I had a blast making this costume.
3 Comments
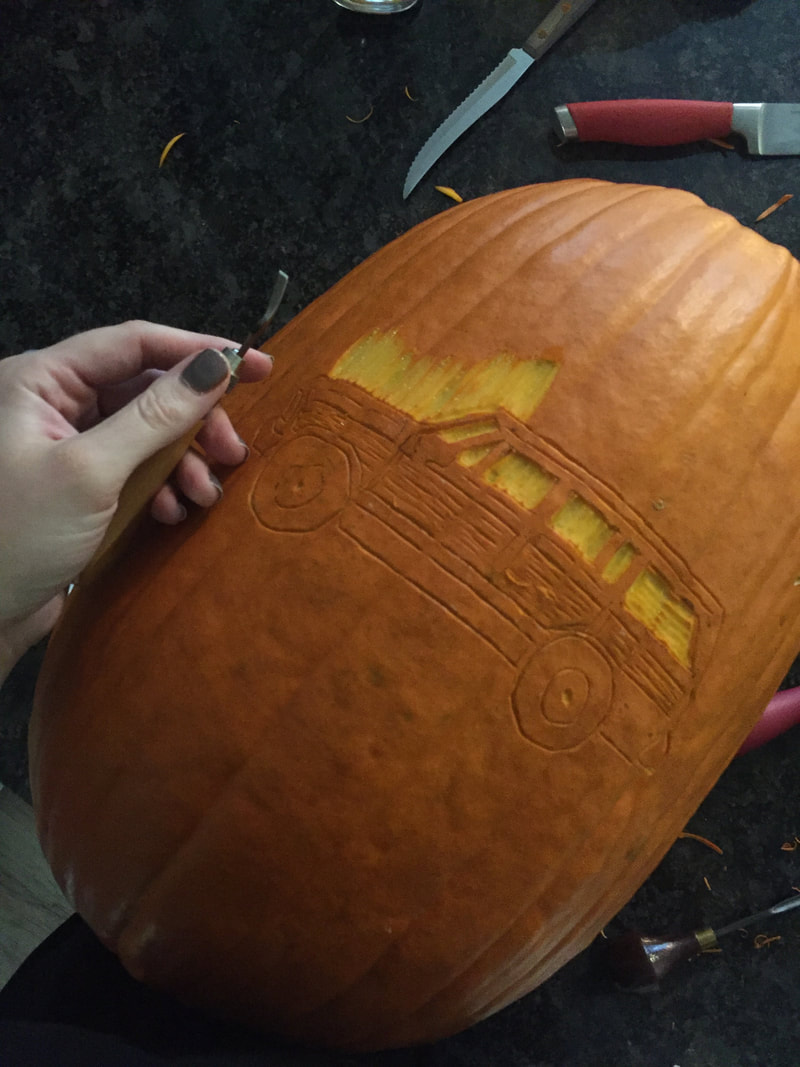
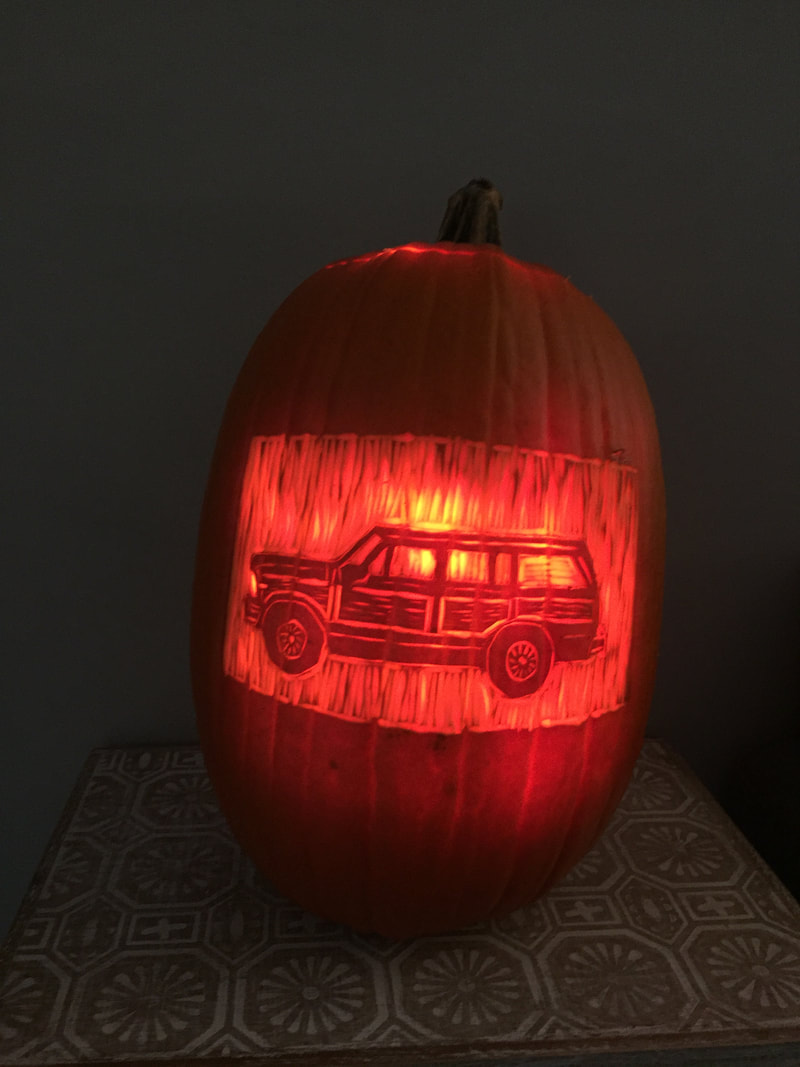
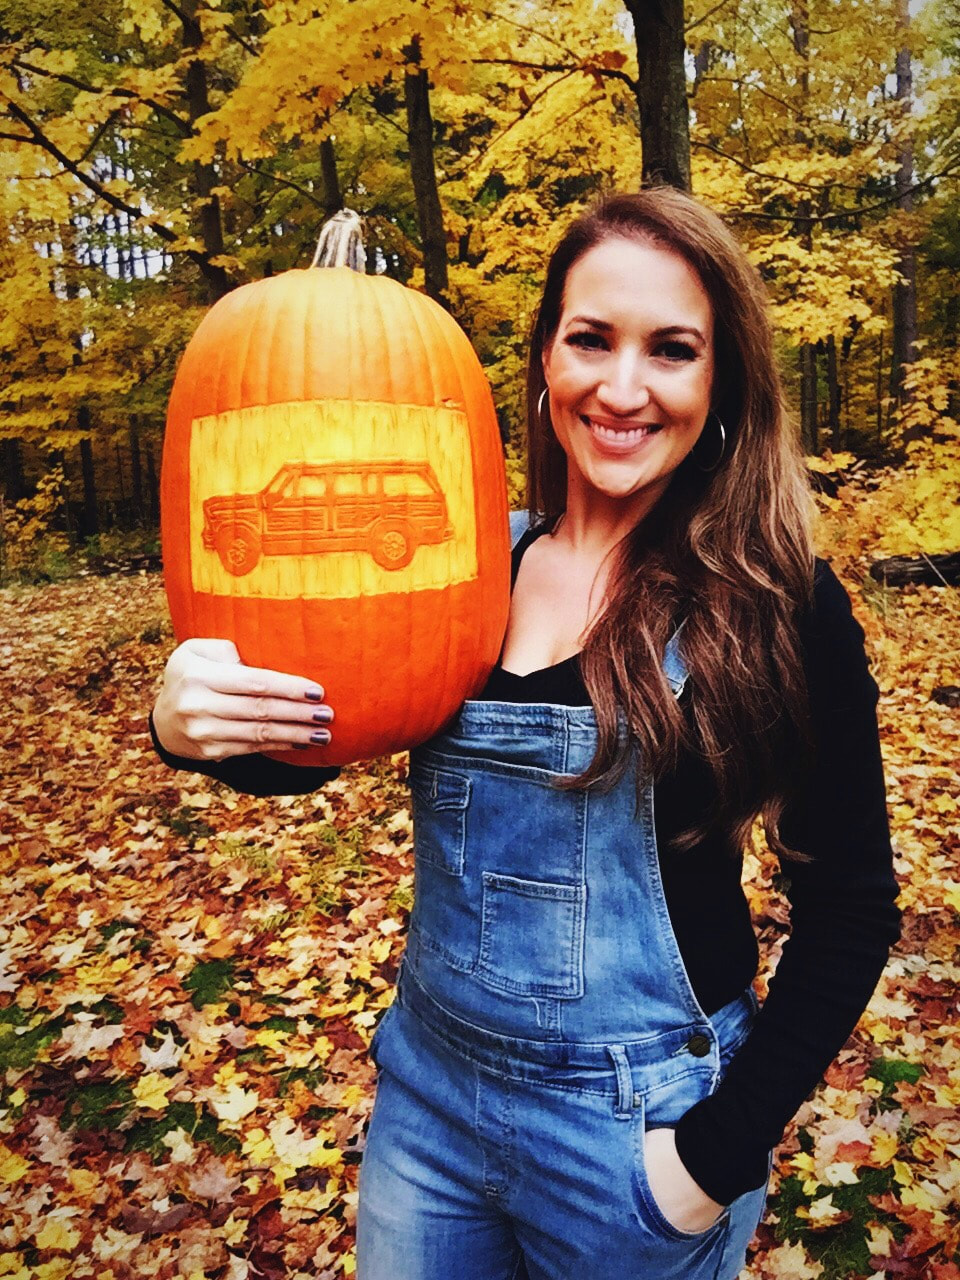
Driving through the colorful scenic woods and lakeshores in Northern Michigan is one of my favorite ways to experience the changing of seasons. It seemed fitting to use that as inspiration for my fall pumpkin carving and carve my Wagoneer into a delightful autumn lantern. I sketched an outline onto the pumpkin and scored it with a knife. Once the outline was in place, I used my wood carving and linocut tools to slowly peel away layers of pumpkin (just deep enough to let light shine through).
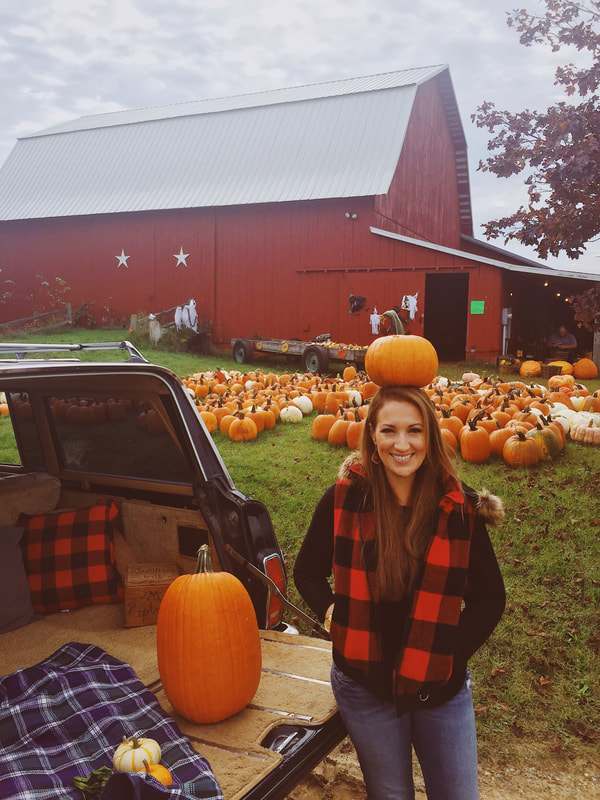
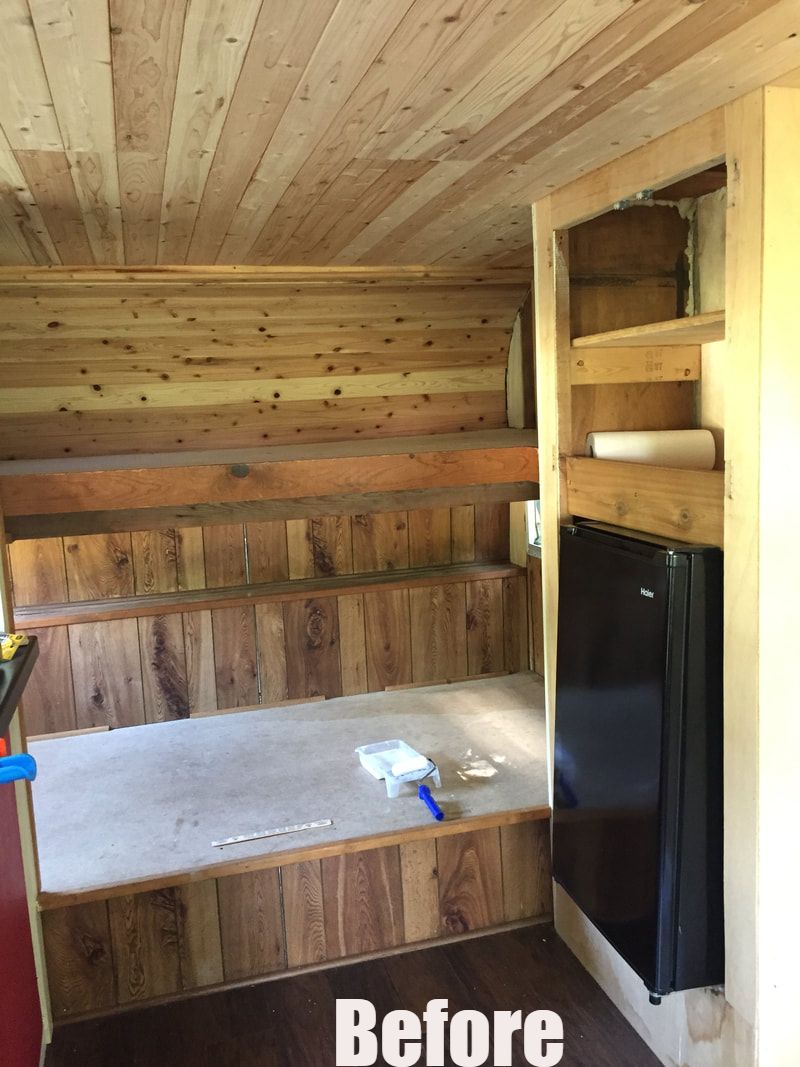
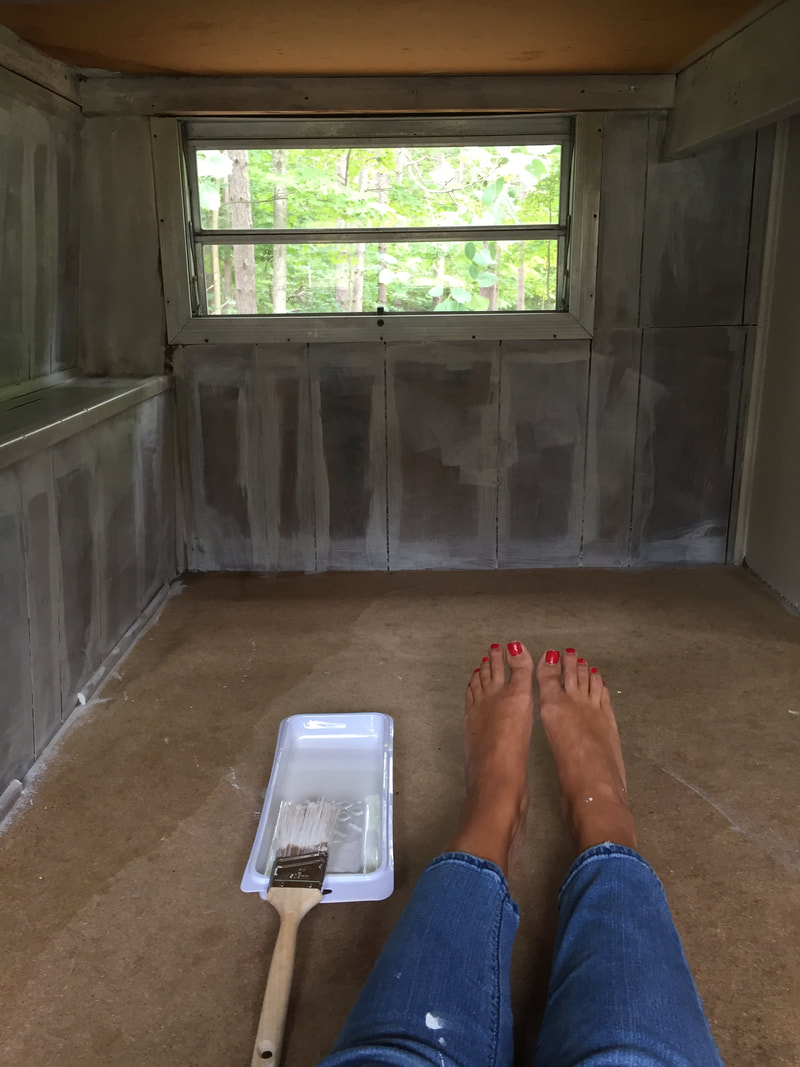
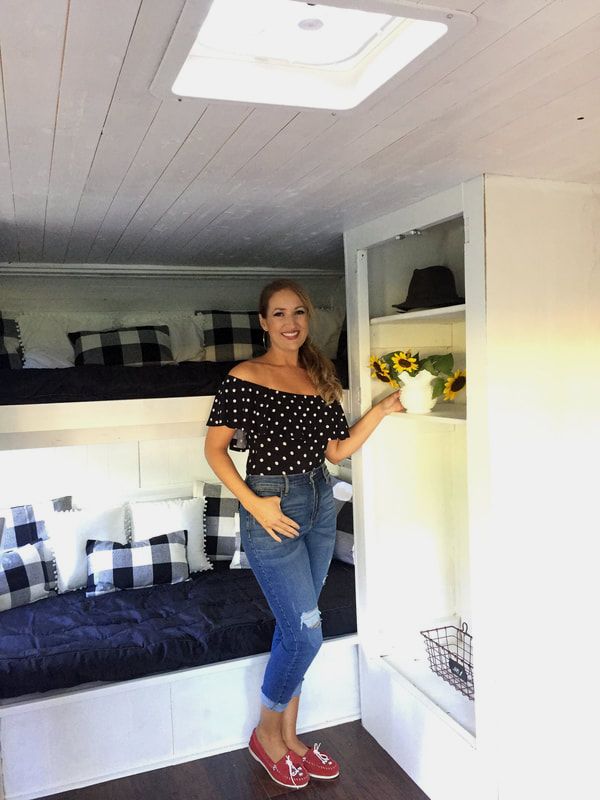
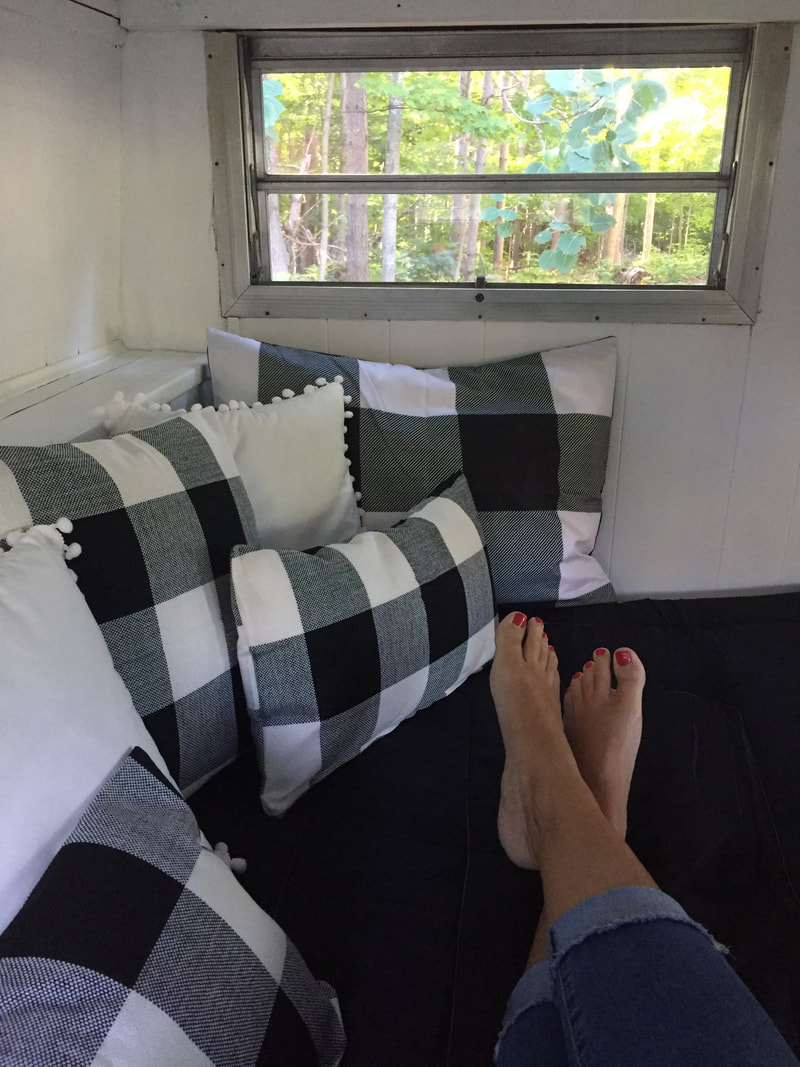
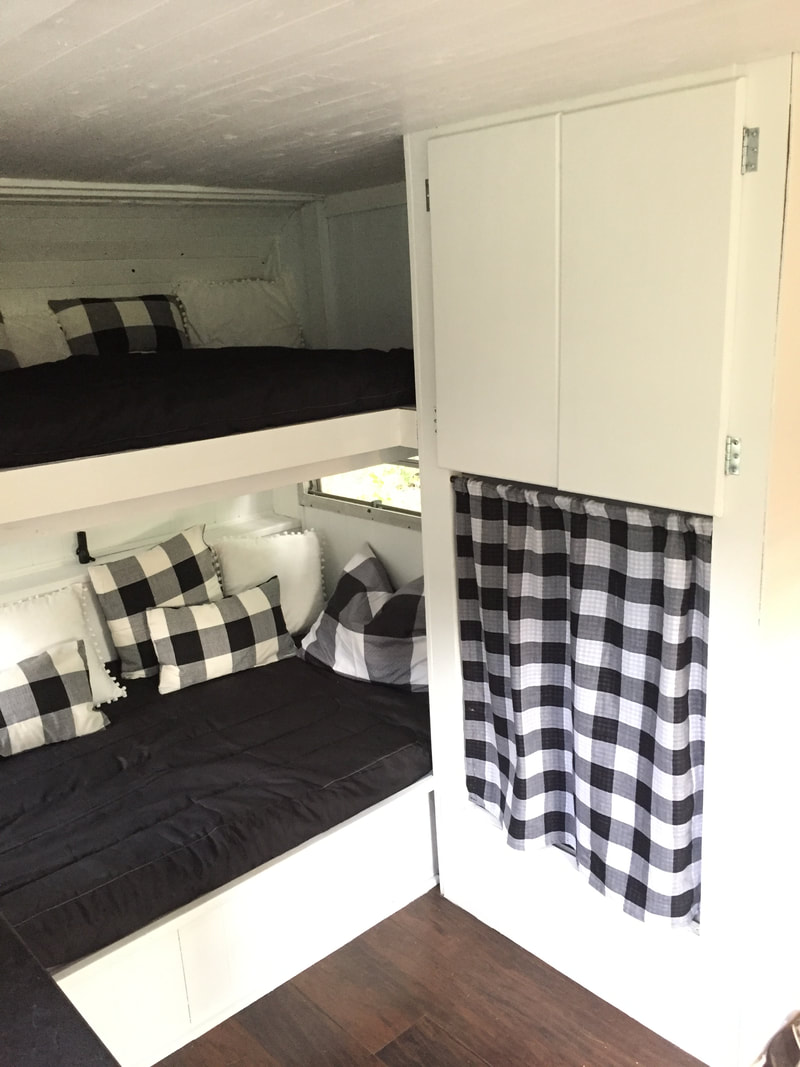
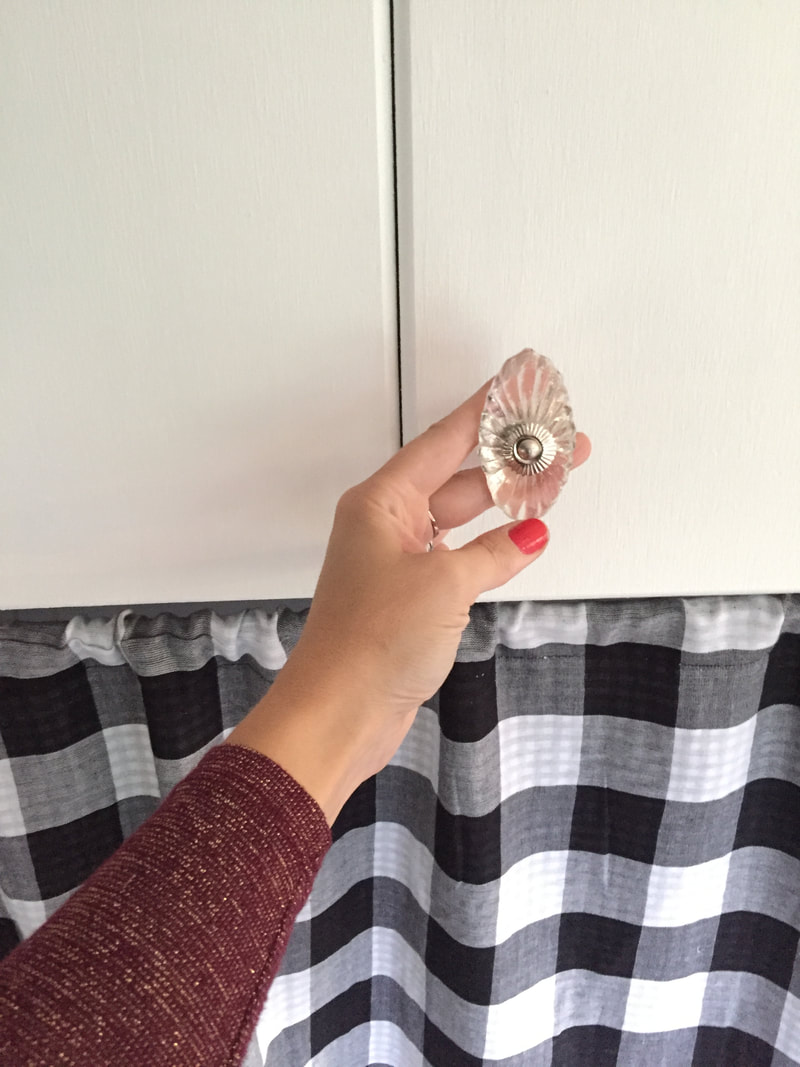
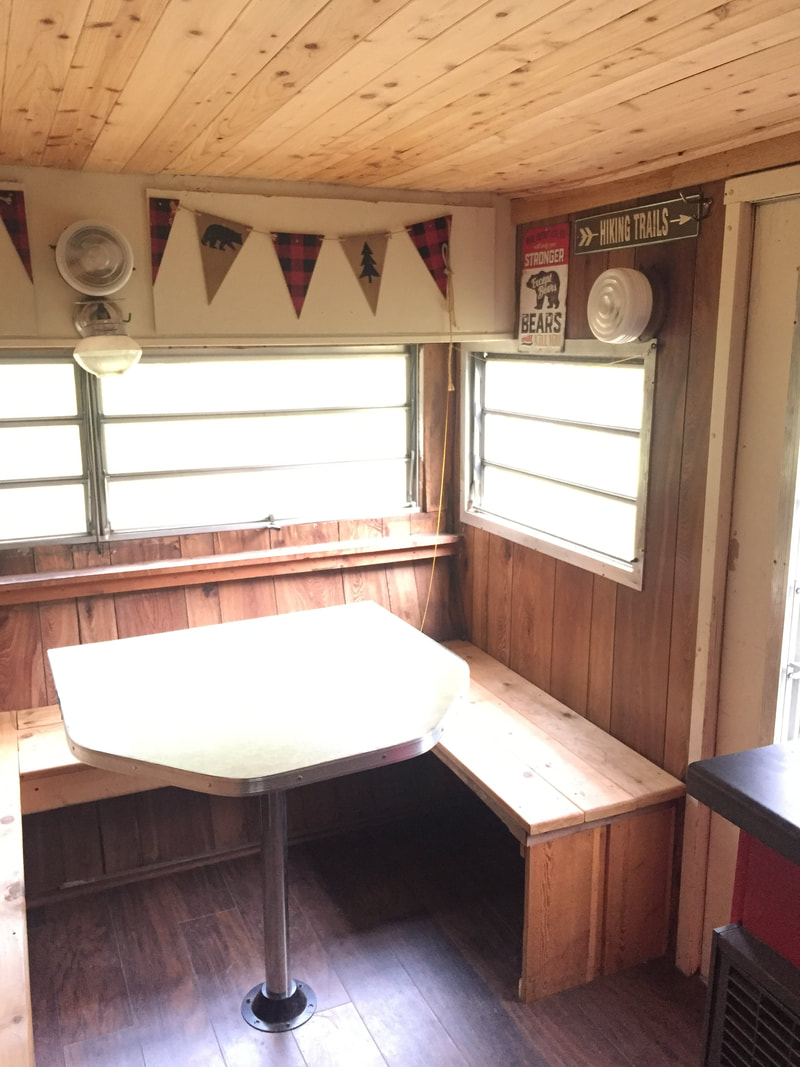
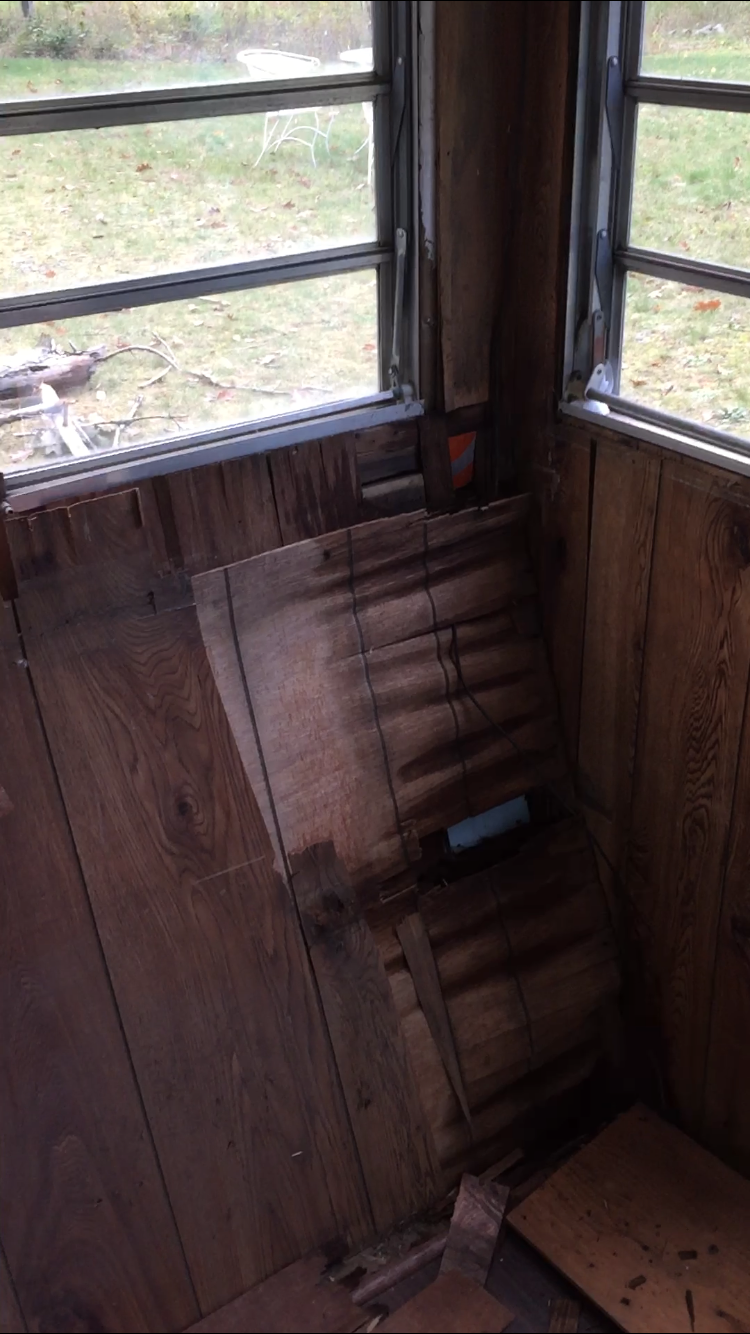
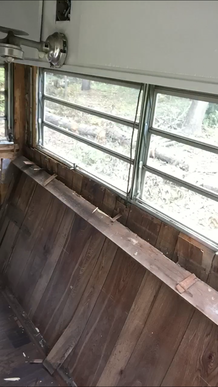
Pumpkin carving turns into a bit of a competitive sport in our family. Each year we gather with relatives to carve our pumpkins, eat comfort foods and roast the pumpkin seeds we've removed. What started as traditional jack o'lantern carving has now morphed into all kinds of unique creations. Undoubtedly, no one was really all that surprised with my pumpkin carving choice. 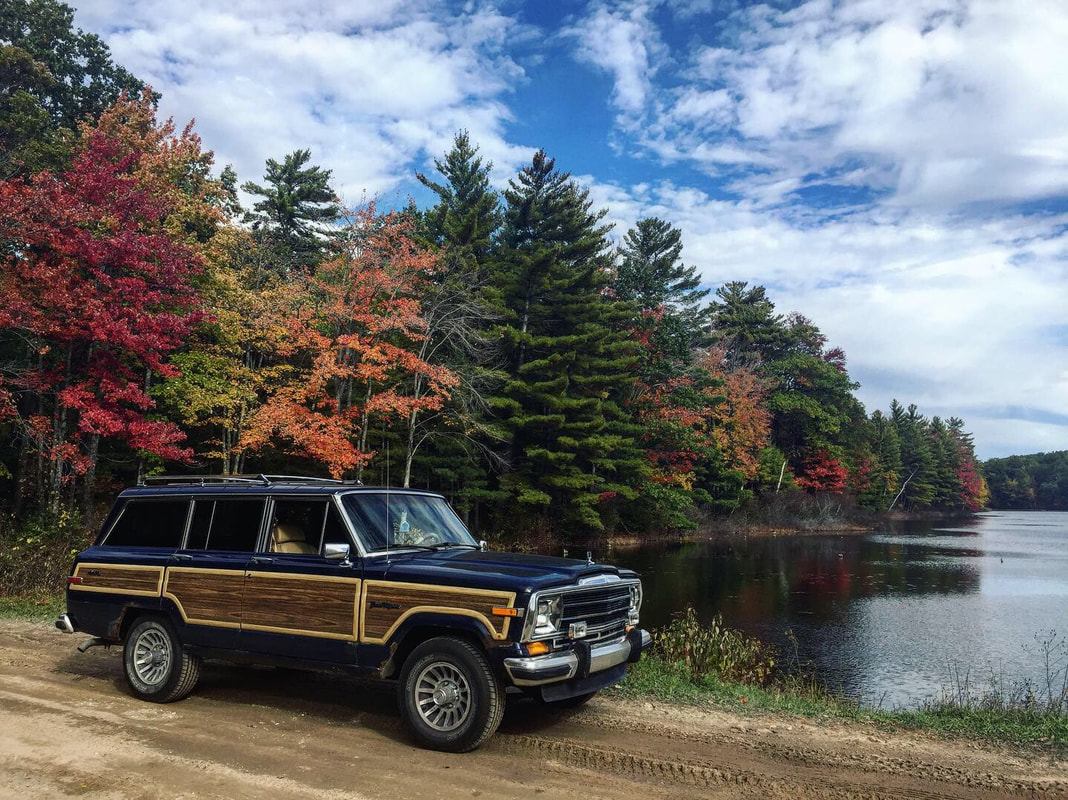 Is it just me, or do you binge watch baking shows and suddenly decide you need to see if you can whip up some kind of sugary masterpiece in your kitchen? With Halloween just around the corner, I decided to dig out my Christmas cast iron gingerbread mold and see if I could modify it to create a spooky (but kind of classy) Halloween gingerbread house. 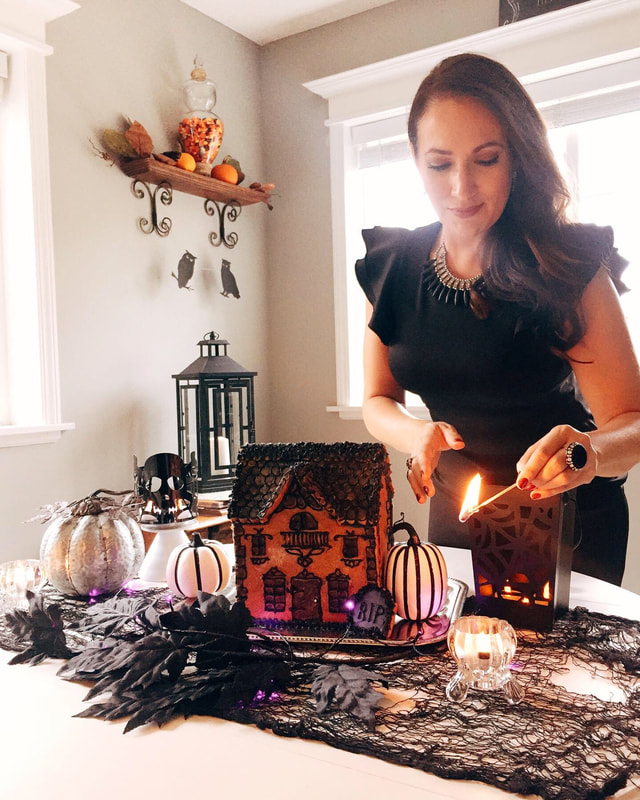 I bought the cast iron form at a garage sale several years ago. One side has the template for the front of the house and roof section. The other side of the template has the forms for the home's sides and awnings. Due to this fact, baking gingerbread becomes a labor of love. Once the gingerbread is mixed, rested in the fridge, rolled out, cut to fit and pressed into the form, it takes 25 minutes to bake each section and ten minutes of cooling before the pieces can be removed and subsequent pieces baked. Ever since I purchased my 1987 Jeep Wagoneer, I've been daydreaming about having a little vintage camper to pull behind it. With the increasing popularity in vintage campers, it's tricky to find one that isn't either so updated that it is out of budget, or so neglected that it is beyond repair. I came across one not too far from home and jumped at the chance to take a look. 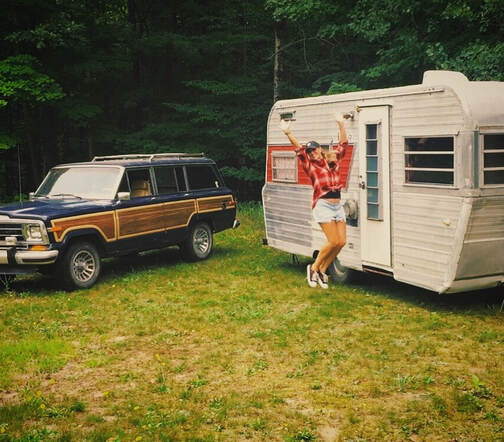 The camper is a 1966 Citation which was somewhat updated several years ago. Some leakage along the roof had been repaired and the inside ceiling and bunk area were all freshly enclosed with new lumber. Though the dining area looked cute, the pine benches someone had added weren't exactly structurally sound. When I removed the benches, I found that the last of the original paneling in that area was dried out and could be peeled away like paper. Due to all of the variations in the types of wood and paneling, I decided to paint everything white to brighten the space and make it look more uniform. As you can see in this video clip, most of the interior is not original to the camper. It isn't my goal to restore it to its original look, but I would like to keep a few of the elements of the era. I'm looking forward to making are new benches for the dining area and resurfacing the kitchen counter and dining table with a matching funky laminate and metal trim edge.
With the bunk section finished, I've turned my attention to the dining area. My plan is to resurface the table with a more coordinating laminate, replace the deteriorated panel with fresh paneling (which will be painted white) and build custom benches for either side of the table.
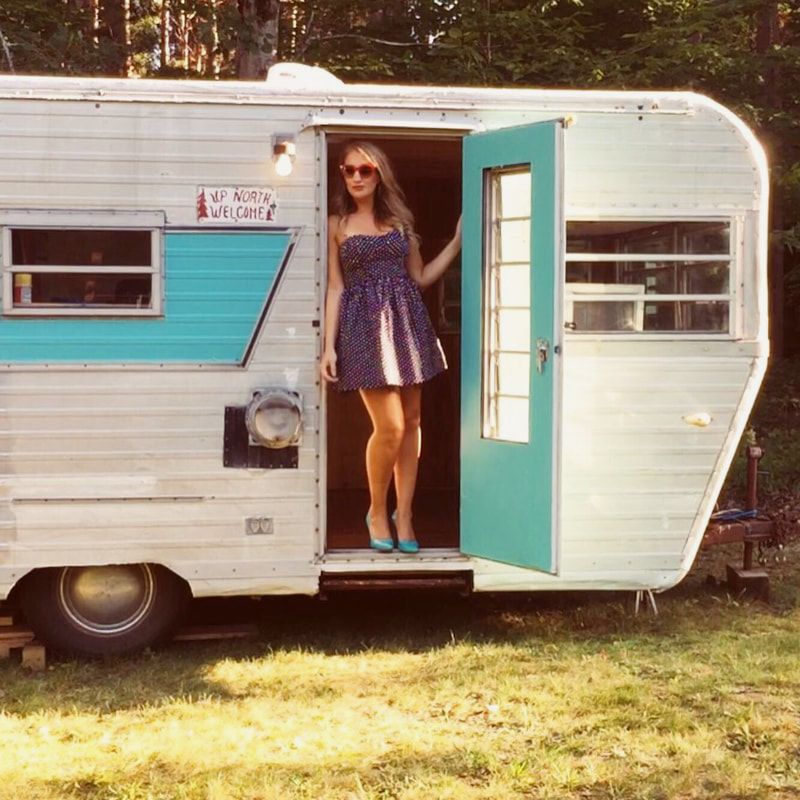 The exterior stripe and door color were inspired by this pair of shoes and the word that always makes me laugh, "glamping."
|
DetailsMy name is Jenny. I'm a hand engraver but I also am a creative who has a tough time sitting still. My mind is always swirling with new project ideas. In between engraving, I like to jump in and out of other activities like restoring a vintage camper, redecorating my home, woodworking and print making (just to name a few). Archives
June 2022
Categories
All
|


 RSS Feed